

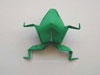
Origami Sink Fold
The origami sink fold is an intermediate technique in origami. We've shown it step by step in at least 2 models - the origami 8-pointed star and the origami standing heart.
Traditionally, the sink fold is shown in the origami diagrams like this:
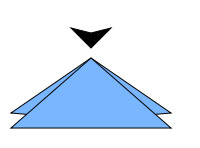
Image was drawn by Sarnitskiy Grigory, obtained from Wikipedia.
That is not very helpful, is it? A triangle with a big arrow on top. Most people, especially beginners, won't know what to do when they see that in the diagrams.
What we're trying to do in a sink fold is to collapse the tip into the paper. Yes, it's a disappearing act!
The way it's often described is to push the tip of the paper in. It's not easy to push a tip into the paper without crushing it though.
We feel that it's much easier to open up the paper and recrease to complete this sink fold.
Below are 2 examples that show how this is done.
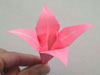
Example 1: The Origami 8-pointed star.
Objective: Sink the tip.

Open up the paper like we've done in the photo below.

To sink the tip, we need to recrease the paper.
See the 4 creases that form a square? They're currently valley folds and we need to recrease them to make them into mountain folds.
If you're new to this, you may want to check out our page on valley and mountain folds.
Make sure you crease well.

We now need to recrease the 2 diagonal creases into valley folds. Make sure to crease well.

This is what you should have recreasing. Do you see the difference between what you had in the previous steps and now?

Now we're going to complete our goal of sinking that pesky tip. Push in the paper from both sides so that they meet in the center.
This is why you recreased the paper in the previous steps. Recreasing the paper helps you to coax the paper into the shape you want.


See how the tip has disappeared? The tip has sunk!! We've just completed a technique in origami called a sink fold.
AFTER:

BEFORE:
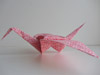
Example 2: The Origami Standing Heart
Objective: Complete a sink fold
We start off with a waterbomb base. Make a mountain fold from the tip to the bottom edge. Crease well and unfold.


We're now going to make the preparations to sink the tip of the waterbomb base.

Unfold your paper.

To sink the tip, we've to recrease the folds. First, recrease the the four edges that make a square into mountain folds. Then recrease the 2 diagonal lines into valley folds.


Now we're actually going to sink the tip. Just like when you folded the waterbomb base, start pushing both sides of the paper inwards towards the center. The paper will collapse easily due to the creases you've made in the previous steps.


Compare this picture to the first picture. The tip of the waterbomb base has disappeared! You've just completed a technique called sinking the tip or a sink fold.
AFTER:

BEFORE: